Thursday 22 February 2024

Escape from Aniron Part 5

The final showdown

Master Vhing and friends have escaped from the clutches of evil crime lord Zenyatta Mondatta in the shuttle Synchronicity II (read all about it here). They have landed at Lahini spaceport (one of Aniron's smaller spaceports) to stock up on fuel for the lightspeed engines. Master Vhing has just sent his friends to find fuel, when he feels a disturbance in The Force.

He is relieved at first when Master Yoda arrives at the spaceport with two Jedi Knights he saved from order 66. But then the Dark Side makes its presence known...

Darth Vader has recovered from the wounds inflicted by Master Vhing (see Part 1) and has brought four inquisitors with him. Bent on revenge Darth Vader heads towards the Jedi for a final showdown.

The bad guys/gals

The good guys/gals

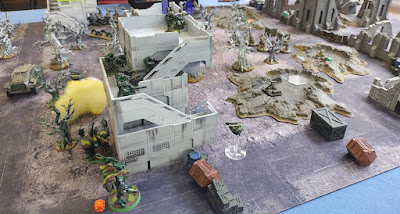
It's business as usual at Lahini spaceport.

Customers and mechanics arguing about repairs


Lifter droid is loading do-it-yourself furniture


Darth Vader and the inquisitors enter the scene, startling the locals.


The Jedi enter from the opposite side, warning the locals of the danger.


The intergalactic furniture transporter has seen enough and decides to lift off and get away (random event).


Both sides approach each other while the lifter droid is desperately trying to get out of the way.


Darth Vader tries a Force Choke on Mezir Arpo, in an attempt to reduce the opposition, but Mezir shrugs it off.


Master Yoda attacks, striking down Vader.


Mezir joins in and together they take Vader out of action!


Enraged by the sight of their lord going down, both Sister and Second brother join the fray.


Mezir and Second brother simultaneously strike each other down!


Nearby, Master Vhing takes on First brother and Brother.


 Kovash rushes to aid Master Vhing, but is immediately struck down by Brother.


Master Vhing hits First brother where it hurts and he goes down with a wound.


Master Yoda dispatches Sister and scans the area while bystanders are either trying to find shelter or watching the fight.


Let me back in!!

Another ship takes off just as Master Vhing and Brother (again simultaneously) cut each other deep enough to take them out of action.


First brother and Kovash recover and get back on their feet, just in time to see Master Yoda swinging his light saber to strike First brother.


However..... First brother parries the blow and strikes Master Yoda. Master Yoda is out of action!


Now only Kovash and First brother are left in the fight. Both are wounded. They circle each other, looking for an opening or a momentary loss of focus.

Then Kovash uses The Force to execute the perfect strike. First brother goes down and doesn't get up.


With the help of Master Vhing's friends, Kovash brings Master Vhing, Master Yoda and Mezir on board the fully fueled Synchronicity II. While the severely wounded Jedi recover in the on board Bacta tank, Synchronicity II leaves Aniron's atmosphere and escapes from Aniron.

Imperial security forces recover Darth Vader and he is transported to an Imperial medical center.


A fitting conclusion to our Escape from Aniron campaign. My son really enjoyed the games and is looking forward to a new Fistful of Lead campaign. I had to bend the rules a bit in this last game to allow more than one leader for the Jedi and a large number of specialists, but the line up seemed fitting for a final showdown.


Sunday 18 February 2024

Project Star Wars part 17: Rebel Commandos

I came across a bunch of very reasonably priced Wargames Atlantic Raumjäger sprues on an internet marketplace and thought: these could be Star Wars Rebel Commandos.

After removing the very German WW2 looking gas mask canister from the figures, I also removed the magazines from the assault rifle type Raumjäger firearms. Star Wars Rebel rifles never seem to have magazines attached to firearms. At least not in front of the trigger.

The heads were another item which had to be swapped. One of the Raumjäger heads (with cap) looked OK for Rebel Commandos, but I wanted some variety so I went with helmeted heads and heads with caps from the Wargames Atlantic cannon fodder sprue. This also was a good source for backpacks and other bits. For the non-human members I used a GW space marine head and several spare heads from Legion kits.

More bits came from Bolt Action US paratroopers, GW Catachans and Mantic GCPS.

This gave me a Rebel Commando platoon consisting of three 8-man squads. Each squad is led by a sergeant and has an AT rifle, the Star Wars equivalent of an LMG and a long range radio. The platoon is commanded by a lieutenant. They are supported by a 4-man combat engineer team (demolitions, flamer, heavy blaster).

Coming soon to a forest moon near you!


Combat engineers


My kids bought me the Legion Yoda for my birthday. The box contains enough parts for 2 Yodas. I finished the first one.


Monday 12 February 2024

Paradise city

More power armour gaming at the club last weekend.

The scenario:

A labour dispute has escalated into a full scale uprising. After first bombing the insurgents and defoliating the vegetation in their main city, the alien corporate overseers have sent a negotiator.

The negiotiator is however immediately taken hostage and a small alien task force is sent to extract him.

The whole area is littered with sentry guns/drones which can be activiated by insurgent drone operators.

All is quiet while the dust is settling

The negotiator has slipped away from his captors

Sniper team deploys

Insurgents take up positions and recapture the negotiator

Firepower still in their parking bays

The big guys deploy, but immediately come under heavy machine gun fire and several guided missiles.


An insurgent flamer squad and a squad of "power armour knackers" are closing in on one of the alien power armour troopers.


Reasoning that attack is the best type of defense, the power armour trooper engages in close combat. Unfortunately the power armour knackers inflict an enourmous amount of damage on the suit and the pilot has to eject to save his blue gray skin.


When another power armour trooper accumulates too much shock from concentrated machine gun fire and breaks, the other members of the alien task force leave their negotiator behind and retreat to safety.


Saturday 3 February 2024

After Curly Billy shot down Crazy Sam McGee Part 2

Curly Billy and his gang got away with Broadstone's bookkeeper in Part 1. Now they are trying to escape through Dry Gulch Canyon. Broadstone's men have cut them off however and a showdown in the canyon ensues.


Part 2: High noon in Dry Gulch Canyon.


Broadstone's men enter from the left, Curly Billy and his gang from the right.

Thomas Brown secures the high ground while Davey Kroket and Johnny "the Duke" Robberts move forward, using an abandoned wagon as cover. "They got away at the cabin, but this time we'll get these outlaws", says Davey.


On the other side of the canyon Hans and Paddy try to get to the area of cover in the centre of the Canyon floor, while Curly Billy and Mad Jack move up along the canyon walls.


Paddy got Mad Jack's shotgun to celebrate his promotion from greenhorn to shootist. Mad Jack switched to his old but reliable musket.


And then the shooting starts.

Hans runs rather foolhardedly forward and exchanges fire with both the Duke and the Snake.


Paddy triggers a random event and suddenly faces a group of Broadstone's Henchmen.


Paddy blasts them with his shotgun, supported by some long range Winchester fire from Curly Billy.


The henchmen group loses 2 men dead and is out of the fight. Both gang members and lawmen have dodged bullets and are pinned down.


Davey Kroket closes in on Paddy, wounding him, but not fatally. Paddy almost kills himself when a thrown stick of dynamite bounces back from a tree and explodes near him.


He does however succeed in getting on his feet and wounding Davey with his Colt (his shotgun being empty). Since Hans and Mad Jack reduced the Snake's action dice to zero in the mean time, this is too much for Broadstone's men and they fail their Ride or Die test.


Curly Billy now controls the canyon. Because Hans is promoted from greenhorn to shootist he announces that from now on he wants to be called "Arizona".
Broadstone's men retreat, carrying a badly wounded Charley "the Snake" Blackfoot. Charley recovers but loses his left arm, earning him the nickname: "the one-armed Snake".

Will Curly Billy's winning streak continue or will the Law prevail? Stay tuned for part 3!